Write and publish a page
Create the page, write in the editor, and change the status to Publicado (Published) when it's ready. Content is saved automatically while you type.
Create and write
- 1
Open a space and click `Nova página` (New page).
The page is created on the spot, titled
Sem título(Untitled) — there is no naming dialog — and opens in reading mode. Inside a folder, the same button creates the page in that folder. - 2
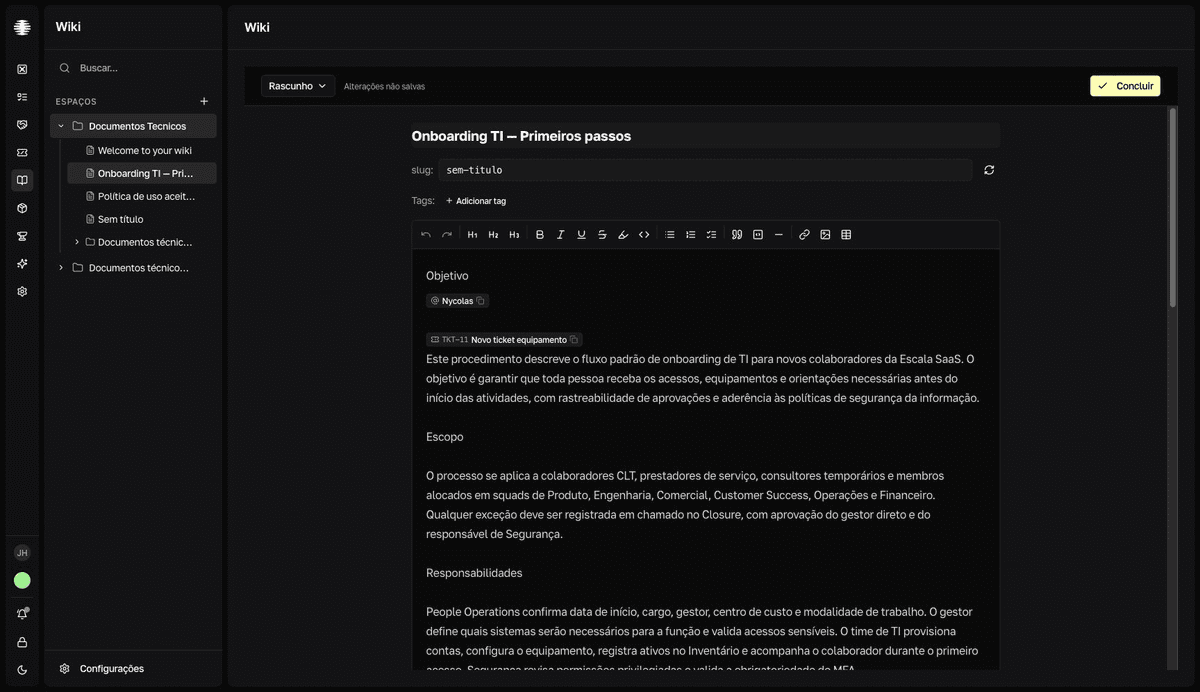
Click `Editar` (Edit).
The editor opens with the
Título da página(Page title) field, the tags row, and the content. - 3
Give it a title and write the content.
The formatting bar covers headings, lists,
Lista de tarefas(Task list),Tabela(Table),Bloco de código(Code block) with syntax highlighting,Link, andImagem(Image). To insert an image, paste or drag the file straight into the text. Type@to mention people, tickets, and other pages — see Mention people, tickets, and pages. - 4
Click `Concluir` (Done) to return to reading mode.
Concluirsaves everything — title, content, tags, status, and slug — and creates a revision in the history.resultThe page appears in the space with the Rascunho (Draft) badge.
Automatic and manual saving
The editor saves title and content on its own a few seconds after you stop typing. The indicator at the top shows Salvando… (Saving), Salvo (Saved), or Alterações não salvas (Unsaved changes). To save everything at once, use Cmd/Ctrl+S; Esc saves and exits edit mode.
Autosave doesn't save everything
Tags and slug are only saved on a full save (Concluir or Cmd/Ctrl+S); the status is saved the moment you switch it in the selector. Autosave also doesn't create revisions — see View and restore revisions.
Publish the page
- 1
In the editor, open the status selector and choose `Publicado` (Published).
The change is saved immediately. In reading mode, the
⋯menu →Publicar(Publish) does the same.resultThe page's badge changes to Publicado. - 2
To unpublish, use `⋯` → `Voltar para rascunho` (Back to draft).
Slug and shared links
The slug is the final segment of the page's address. While the page is a Rascunho (Draft), it's regenerated from the title; once published, it freezes. In the editor, adjust it manually in the slug: row or use the Gerar slug a partir do título (Generate slug from title) button.
Editing the slug breaks links you've already shared
Anyone opening an old link sees the page as unavailable. Get the slug right before sharing the address, not after.