Plan initiatives
An initiative gathers the issues of one large delivery and places it on the roadmap. It lives inside a domain and advances from Pendente (Pending) to Entregue (Delivered).
Create the initiative
- 1
Open `Initiatives` in the Forge sidebar and click `Nova iniciativa` (New initiative).
The button stays disabled if the team has no domains yet — create a domain first.
- 2
Describe the delivery.
Título(Title) — for example, “Checkout internacional” (International checkout) — andDescrição(Description) with context, goal, and success criteria. TheDomainis required. - 3
Place it in time.
Prioridade(Priority, defaultMédia— Medium),Início planejado(Planned start), andData alvo(Target date) set where the initiative appears on the roadmap timeline. - 4
Click `Criar iniciativa` (Create initiative).
resultThe initiative starts as Pendente (Pending), in the roadmap's Planejamento (Planning) column.
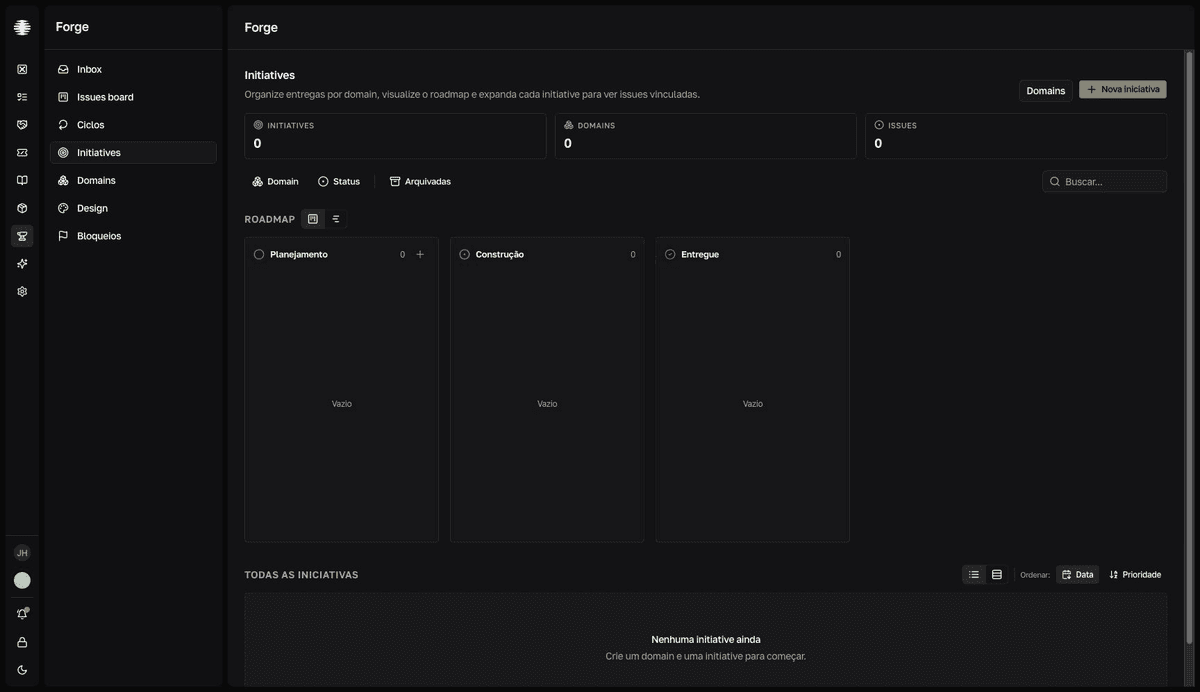
Follow the roadmap
The Roadmap section switches between Kanban and Timeline. In the Kanban, the columns group by stage: Planejamento (Planning) gathers Pendente (Pending), Em avaliação (Evaluating), and Planejada (Planned); Construção (Building) holds Em construção; then Entregue (Delivered) — and Arquivadas (Archived), when the Arquivadas toggle is on. The Timeline draws each initiative as a bar between Início planejado (Planned start) and the target date.
Filter by Domain and Status, search by text, and turn on Arquivadas (Archived) to include the history. The filters go into the URL — copy the address to share the exact view with the team.
In the “Todas as iniciativas” (All initiatives) list, switch between Visualização compacta (Compact view) and Visualização expandida (Expanded view) — each initiative expands to show its linked issues — and sort by Data (Date) or Prioridade (Priority).
Work the initiative
Open the initiative to edit the description and adjust Status, Prioridade (Priority), Domain, Início planejado (Planned start), and Data-alvo (Target date) — every change saves instantly. The Issues panel splits into the Em aberto (Open) and Concluídas (Completed) tabs, and the Nova issue (New issue) button creates issues already linked to the initiative. To compare initiatives by impact and cost, score the outcomes and record the estimates.
Define the initiative with Muse
The Definição (Definition) section in the initiative detail holds the scope document. Muse runs a structured interview — one question at a time — and writes the document from your answers. A Forge manager approves the result; once approved, Muse can decompose the definition into issues.
- 1
Click `Iniciar sessão de definição` (Start definition session) in the `Definição` section.
The Muse conversation opens. If a session is already in progress, the button changes to
Retomar sessão de definição(Resume definition session). - 2
Answer the interview questions.
Muse covers functional scope, users, interaction flow, data model, and other relevant aspects. At the end, it writes the definition and shows the status
Rascunho(Draft). - 3
A Forge manager clicks `Aprovar` (Approve).
The status changes to
Aprovada(Approved). Any team member can edit a draft; to revert an approval, clickReabrir(Reopen). - 4
Click `Gerar issues` (Generate issues) to decompose the definition.
Muse reads the approved definition and creates the work issues, already linked to the initiative.
resultIssues appear in the initiative's Issues panel and on the Forge board.
You can also write manually
If you prefer not to use the interview, click Escrever manualmente (Write manually) in the Definição section to draft the document directly in the editor. The Gerar issues button becomes available after approval.